Green Chile Cheese Bread
Green Chile Cheese Bread takes humble French bread and turns it into a golden, bubbling, irresistible side dish in about 10 minutes. A rich spread of butter, mayonnaise, sharp cheddar, and tangy green chiles soaks into the soft interior while the top crisps and caramelizes under the broiler. The result is a satisfying contrast: crunchy edges, a tender center, and a gooey, savory topping with a gentle Southwestern warmth.
It’s the kind of recipe that earns a permanent place in your rotation because it asks so little and gives so much. With just five ingredients and no special skills, it fits easily alongside a weeknight soup, a backyard barbecue, or a holiday spread, and it almost always vanishes before anything else on the table.
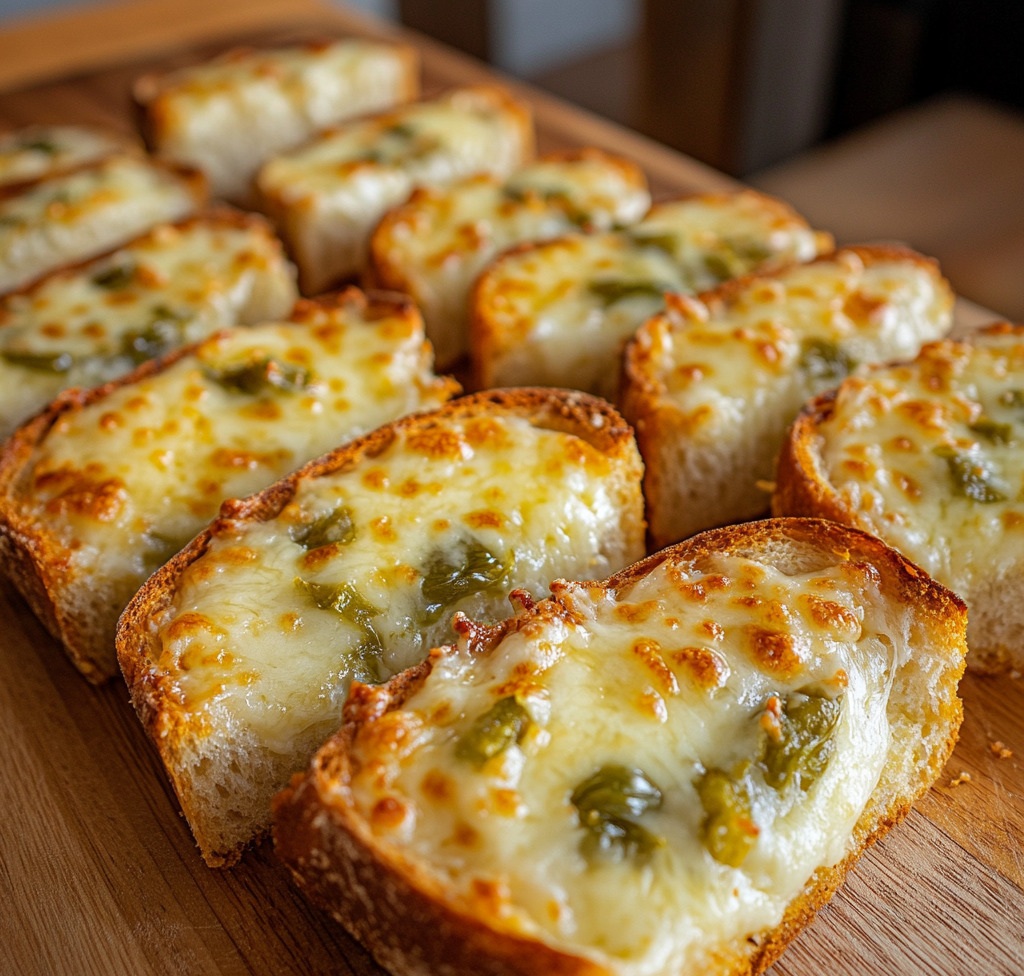
Why People Will Love Green Chile Cheese Bread Recipe
Ready in minutes: From mixing to serving, it takes about 10–15 minutes, making it one of the fastest homemade sides you can put together.
Only five ingredients: Everything is simple and easy to find, and much of it is likely already in your kitchen.
Irresistible texture contrast: Crisp, golden edges give way to a soft, buttery center topped with molten cheese.
Flavor with a twist: Green chiles add a tangy, mildly smoky heat that makes this taste more exciting than ordinary garlic or cheese bread.
Mild, family-friendly spice: Canned green chiles are gentle, so the bread appeals to kids and spice-shy eaters while still tasting bold.
Mayonnaise makes it magic: It keeps the topping creamy, helps it brown beautifully, and stops the cheese from turning greasy or rubbery.
Endlessly versatile: It pairs with soups, chili, pasta, grilled meats, salads, and Tex-Mex dishes alike.
Perfect for sharing: One loaf feeds a group, which makes it ideal for parties, potlucks, and game days.
Easy to customize: Swap in different cheeses, add garlic or spices, or turn up the heat with jalapeños.
Make-ahead friendly: The topping can be prepped in advance, so you only need to spread and bake when guests arrive.
Key Ingredients
French bread: Its crisp crust and airy, tender crumb make the ideal base. The crust holds up under the rich topping, while the soft interior absorbs the buttery, cheesy flavors.
Butter: Softened butter spreads easily and soaks into the bread, giving it rich flavor and helping the edges toast to a deep golden brown.
Mayonnaise: The secret ingredient. Made from oil and egg, it adds creaminess, helps the topping brown evenly, and keeps the cheese smooth and spreadable instead of oily.
Cheddar cheese: Sharp cheddar provides bold, tangy flavor and melts into a bubbly, golden crust. Shredding it yourself gives the smoothest melt.
Diced green chiles: They bring a mild heat, gentle smokiness, and bright tang. Including their juices adds moisture and spreads chile flavor through every bite.
Expert Tips
Soften the butter properly: Let it sit at room temperature for 30–60 minutes until it’s spreadable but not melted. Melted butter will make the mixture runny and the bread soggy.
Shred your own cheese: Pre-shredded cheese contains anti-caking agents that can prevent a smooth melt. Freshly grated sharp cheddar melts better and tastes stronger.
Pat the chiles slightly if your bread is very soft: The juice adds flavor, but too much can soak the bread. If your loaf is light and airy, drain off a little of the liquid.
Spread all the way to the edges: Covering the bread edge to edge keeps the crust from burning and ensures every bite has topping.
Choose a sturdy loaf: A day-old or crusty French bread holds up better than a very soft, fluffy one.
Use the top rack for broiling: Position the oven rack about 6 inches below the broiler for even browning without scorching.
Never walk away while broiling: The topping can go from golden to burnt in as little as 30 seconds. Stay at the oven and watch.
Rotate the pan if needed: Broilers often heat unevenly. Turn the pan halfway through for even browning.
Add garlic for extra depth: A clove or two of minced garlic, or ½ teaspoon of garlic powder, adds a rich, savory layer.
Rest before slicing: Let the bread cool for 1–2 minutes so the cheese sets slightly, making cleaner cuts and preventing burns.
Use a serrated knife: It cuts through the crisp crust without squashing the soft interior or dragging the topping.
Green Chile Cheese Bread
Ingredients
French bread: 1 loaf
Butter: ½ cup, at room temperature
Mayonnaise: ⅓ cup
Cheddar cheese: 1 cup, shredded
Diced green chiles: 1 can (4 oz), juices included
Instructions
Step 1: Heat the oven.
Set your oven to 500°F (260°C).
To make cleanup simple, cover a baking sheet with foil or a silicone baking mat.
Step 2: Make the topping.
In a medium bowl, stir together the softened butter, mayonnaise, green chiles with their juices, and shredded cheddar.
Keep mixing until everything is well combined and smooth.
Step 3: Prepare the bread.
Cut the French bread in half the long way.
Spread the cheesy chile mixture evenly across both cut sides, then lay the halves on the lined baking sheet with the topping facing up.
Step 4: Bake and broil.
Bake for 5 minutes, then turn the oven to broil.
Broil until the topping is bubbling and golden brown in spots.
Keep a close eye on it, since it can go from golden to burnt in seconds.
Step 5: Slice and serve.
Take the bread out of the oven and let it cool for a minute or two.
Cut it into pieces and serve while it’s still warm.
Important Notes When Making Green Chile Cheese Bread
Ovens and broilers vary: Baking and broiling times are guides. Rely on color and bubbling rather than the clock.
Watch the heat level: 500°F is very hot. Use oven mitts, and be careful of the hot pan and bubbling cheese.
Best served fresh: The bread is at its best right out of the oven, when the edges are crisp and the cheese is melted.
Leftovers soften: Stored bread loses crispness. Reheat it in the oven or air fryer, not the microwave, to restore the texture.
Storage: Wrap leftovers in foil and refrigerate for up to 2–3 days.
Make the topping ahead: The butter-cheese-chile mixture keeps in the fridge for up to 3 days. Let it soften at room temperature before spreading.
Freezing: You can freeze the assembled, unbaked halves wrapped tightly in plastic and foil for up to 2 months. Bake from frozen at 425°F (220°C) for 10–15 minutes, then broil briefly.
Allergens: This recipe contains wheat (gluten), dairy, and egg (from mayonnaise).
Sodium adds up: Bread, butter, cheese, mayonnaise, and canned chiles all contain salt, so no extra salt is needed.
How to Enjoy Green Chile Cheese Bread After Cooking
Serve it hot. Green chile cheese bread is best enjoyed within minutes of coming out of the oven, while the cheese is still molten and the crust is crisp. Slice it into 2-inch pieces for sides, or into thin strips for party snacking.
Pair it with great mains.
Soups and stews: Chili, tortilla soup, green chile stew, tomato soup, or chicken noodle soup for dunking.
Pasta: Spaghetti, baked ziti, or lasagna, as a fun twist on garlic bread.
Grilled and roasted meats: Steak, grilled chicken, ribs, or pulled pork.
Tex-Mex meals: Enchiladas, taco bowls, fajitas, or burrito casseroles.
Salads: A crisp green salad or Mexican street corn salad for a lighter meal.
Add extra toppings.
Fresh cilantro or sliced green onions for brightness
Diced tomatoes or pico de gallo
Crumbled cooked bacon or chorizo for a heartier bite
Sliced jalapeños or a drizzle of hot sauce for more heat
A sprinkle of smoked paprika or chili flakes
Try fun serving ideas.
Serve it with a side of salsa, ranch, or queso for dipping.
Cut it into small squares and serve as an appetizer at parties.
Make it the base of an open-faced sandwich by adding sliced chicken or turkey.
Set out a platter alongside soups at a “soup and bread” gathering.
Pair with drinks. Cold Mexican lager, iced tea, lemonade, a margarita, or sparkling water with lime all complement the rich, cheesy flavor.
Reheat leftovers properly.
Oven: Bake at 375°F (190°C) for 5–8 minutes, until hot and crisp again.
Air fryer: Heat at 350°F (175°C) for 3–4 minutes.
Toaster oven: Ideal for one or two slices; heat until the cheese melts and the edges crisp.
Avoid the microwave, which makes the bread chewy and soggy.
Nutrition Information
Estimated per serving, based on 12 slices from a 1-pound loaf of French bread, made with salted butter and regular mayonnaise.
Calories: 255 kcal | Total Fat: 16.7 g | Saturated Fat: 7.6 g | Monounsaturated Fat: 4.2 g | Polyunsaturated Fat: 3.7 g | Cholesterol: 33 mg | Sodium: 400–440 mg (depending on bread, butter, and canned chiles) | Total Carbohydrates: 20.3 g | Dietary Fiber: 1 g | Sugars: 1.4 g | Protein: 6.4 g
Note: Using unsalted butter lowers sodium by about 60 mg per serving. Light mayonnaise reduces each slice by roughly 25 calories and 3 g of fat.
Smart FAQs About This Recipe
Is green chile cheese bread spicy?
Not very. Canned diced green chiles are usually mild, adding more tangy, smoky flavor than heat. For extra spice, use “hot” green chiles or add diced jalapeños.
Why does this recipe use mayonnaise?
Mayonnaise keeps the topping creamy, helps it brown evenly, and prevents the cheese from becoming oily or tough. Once baked, you won’t taste it as mayonnaise; it simply makes the topping richer.
Can I use a different cheese?
Yes. Monterey Jack, pepper jack, Colby Jack, or a Mexican cheese blend all work well. Pepper jack adds extra heat, while mozzarella gives a stretchier topping.
Can I use fresh roasted green chiles instead of canned?
Absolutely. Use about ½ cup of chopped fresh roasted chiles, such as Hatch or Anaheim. They’ll add a smokier, more vibrant flavor. Add a tablespoon of water or milk if the mixture seems too thick.
What can I serve with green chile cheese bread?
It pairs well with chili, soups, pasta, grilled meats, salads, and Tex-Mex dishes. It’s also great on its own as a party appetizer with salsa or queso for dipping.
Can I make this without a broiler?
Yes. Bake at 450°F (230°C) for 10–12 minutes, until the cheese is melted and bubbly. It won’t brown quite as deeply, but it will still taste delicious.
How do I keep the bread from getting soggy?
Use a crusty, slightly firm loaf, drain some of the chile juice if the mixture looks wet, and use softened (not melted) butter. Serving it right away also keeps it crisp.
Can I prepare it ahead of time?
Yes. Mix the topping up to 3 days ahead and refrigerate it. You can also spread it on the bread a few hours in advance, cover tightly, and refrigerate until ready to bake.
Can I use a different type of bread?
Definitely. Italian bread, ciabatta, sourdough, baguettes, or even hoagie rolls all work. Thinner breads like baguettes will bake faster, so watch them closely.
How do I know when it’s done?
Look for a topping that is bubbling all over with golden-brown spots and crisp, toasted edges on the bread. If the cheese is melted but pale, give it another 30–60 seconds under the broiler.